Showing posts with label Fiskars. Show all posts

Monday, November 25, 2013

Punch Art Turkey Thanksgiving Cards

With the Thanksgiving holiday upon us, it only feels natural to want to express our gratitude to those who help make our world go round. Yes?

This year, I'm thanking friends and family with these mixed-media cards featuring a delightful little paper pieced turkey using layers of basic punched shapes using a variety of my Fiskars punches.

First, punch both scalloped circles and regular circles, in graduating sizes, making sure that the colors of each layer contrast with one another. It's also fun to mix up the textures and finishes of the papers you use. For example, maybe mix in some cork paper for the texture and a bit of metallic cardstock for the shine.


For my turkey, the shapes I used from largest to smallest are:
Fiskars Circle Lever Punch 4XL
Fiskars Pretty Scallops Lever Punch 4XL
Fiskars Circle Lever Punch 3XL
Fiskars Pretty Scallops Lever Punch XXL
Fiskars Round ‘N Round Squeeze Punch XL
Fiskars Round ‘N Round Squeeze Punch Large

If you don’t have these exact sizes, get creative in layering the shapes that you do have on hand. Graduated hexagons would make an adorable graphic mod turkey too! It's a darling way to celebrate the season and embellish those cards we like to gift expressing our utmost gratitude. It's even more fun when you can pull out some fun and funky colored cardstock to create your little turkey masterpieces, don't you think!?


Once my turkey was assembled with finishing details, I misted a kraft card base and layered it with washi tape and a 'thanks' banner made with punched pieces and alphabet stickers. Super easy, yet looks like you fussed over it for hours. Love those kind of projects!

You can see the full tutorial with a bit more detailed instructions on Fiskars.com by clicking here.

How many of you send Thanksgiving cards?

Thursday, November 14, 2013

Blowing Kisses Layout featuring Prima Marketing Products


As a designer for Fiskars, I received some products from Prima Marketing, Inc. to pair together with Fiskars tools. I couldn’t resist putting the beautiful 12x12 stencils to use to make my own background paper for a layout.


These stencils are a nice weight and really are perfect for both scrapbooking and mixed media albums and really easy to line up and get centered on the layout as they are the full 12” wide.


To create my background, I first covered my work space to protect it from the mist overspray. Then, used the Circle Lattice stencil over a light blue textured cardstock. I then sprayed a layer of Turquoise Blue Tattered Angels Glimmer Mist all over. Once dry, I added light layers of Sweet Cherry, Mustard and Chartreuse Color Shine just around the edges to give more depth to the color and design. Once that was completely dry, I added some purposeful drips of mist randomly across the background by unscrewing the spritzing mechanism and letting the mist drip onto the page from the end of the uptake tube.


I couldn’t believe how perfect of a match the Say It In Crystals Hexagon Bling matched up with Fiskars Hexagon Squeeze Punches. Like so perfect you’d thing the two companies were in collaboration together in the making of these products. So, I decided that the hexagon punched shapes and the bling would be paired together as accents on the layout. They were punched from Coredinations Cardstock and then some of them even layered together on the page.


To put the page together, I layered several coordinating pieces of patterned paper on top of the stenciled background before adding two matted photos. These papers were right-aligned as to leave space along the left for embellishing with flowers, wooden icons in a box and the hexagon bling, all by Prima Marketing, Inc.

Prima Supplies:
Flowers: Cabriole – Lavender
Wooden Icons In A Box: Birds and Owls
Wooden Icons In A Box: Leaves and Mushrooms
Say It In Crystals Hexagon Bling

Fiskars Tools:
Paper Trimmer
Hexagon Punches

Full Disclosure: The Prima Marketing, Inc. products were supplied to me free of charge for the purpose of creating this tutorial. I was not compensated in addition to the free supplies. 

Thursday, February 21, 2013

Creating a Disney Scrapbook

seven months ago my family was having a blast on a week-long Disney vacation at Walt Disney World in Orlando, Florida. you might have noticed that i haven't shared a single thing about that vacation.

why? well, the truth is......i'm overwhelmed with how exactly to record the magical-ness of it. (if magical-ness isn't a word, it is now.)

do you ever get that way with your photos and/or memories. frozen for fear of 'messing' it up? silly, isn't it?

i took thousands of photos on that trip. eeeps! we also took advantage of the Photopass system and purchased the CD of images which gave me another 600 or so photos.

gobs and gobs of photos.

this layout is the very first layout i've made that displays photos from our trip....i hope that there are many more to follow, like, real soon!

there are SO many stories to be told from this trip.so many. i can't wait to see them all unfold in the pages of my scrapbooks.

this layout in particular was created using some new products released at CHA from Little Yellow Bicycle's Just Because and Naturals collections. i've also used quite a few Fiskars tools in the mix too!

this layout also appears today on a few other blogs.  in one place i'm talking about tips for putting the layout together and in the other talking about recording vacation memories as a whole. click on over to the Little Yellow Bicycle blog and to the Fiskateers blog for more of the story.  there are also links to products and tools at the respective blogs. 

Wednesday, February 06, 2013

Fiskars: Techniques for Altering A Canvas

stretching yourself creatively by trying new skills beyond your comfort zone of traditional paper crafting is good exercise and can be very liberating as you experiment in using some of your Fiskars tools beyond their typical scope.

that's exactly what i did with one of my latest project tutorials created for Fiskars.

i have to admit that it was super fun adding layer upon layer of paint and texture until i finally stepped back, admired my design, and called it complete.

if you've never altered a canvas before, you'll quickly learn that the beauty of altering a canvas is that once you start with the initial paint layers, you never really know quite how it will look in the end.

afterall, this canvas started out like this:

and then ended up like this:

to see the transformation and learn how to put your tools to work for you in a new way, visit my tutorial over on Fiskars.com: Spread Your Wings and Fly Altered Canvas by Tania Willis

Tuesday, January 29, 2013

Team T-Shirt Pillow Tutorial


hello, friends! i know it's been a while....nearly 2 months, in fact. i'm sorry for that. things get a little crazy around here during the holidays along with the Craft & Hobby trade show that immediately follows.  but i'm getting reacquainted with my pre-holiday schedule and hope to bring more to this internet space of mine soon.

in the meantime....it's a good time to show your team spirit!  i challenge you to spruce up your husband's (or son's) man cave or just make some fun conversation pieces for that Superbowl Party you're planning this weekend. i happen to think these would also be quite popular with the college crowd to add a little fun to their dorm room decor.

anywho. these pillows are made with upcycled team t-shirts and whip up super quick. and guess what?  i have a tutorial to show you exactly how to get from start to finish over Fiskars.com: Team T-Shirt Pillow Tutorial
 
not a sports fan?  no worries. you can use any t-shirt, it doesn't have to be sports themed! 

this is especially perfect for those shirts you fall in love with on the clearance rack or at the thrift store, but inevitably aren't your size. :)  buy it anyway and turn it into a pillow!

t-shirt pillows are especially perfect for decorating a child's playroom or bedroom since they are easily washable.

happy creating & be sure to show me your finished pillows!

Wednesday, November 28, 2012

Gift Giving on A Budget: How to Make Birdseed Ornaments

it's time to put your hands to use to craft thoughtful gifts for family, friends and service workers this holiday season.

gifting something small to your nature-loving friends really couldn’t be easier than these little ornamental birdseed feeders! you can quickly mix up a batch of ornaments in 15 minutes, and craft the adorable feathered friend bird tags to adorn your gift wrap while the ornaments are set aside to dry.
while this craft doesn't take much time at all to pull together, be warned that dry time does take 24 – 48 hours depending on the humidity in your area, so be sure to plan accordingly for that part of the project.

it’s a very economical craft and perfect to give as favors during the holidays or your next celebration. it's also a super easy project for children to assist with. imagine the joy on their faces as they present them to grandparents &/or teachers telling them that they made them. :)

you can learn how to create your own from start to finish, including the gift wrap portion by visiting my tutorial on the Fiskars website: Birdseed Ornaments by Tania Willis


Monday, November 26, 2012

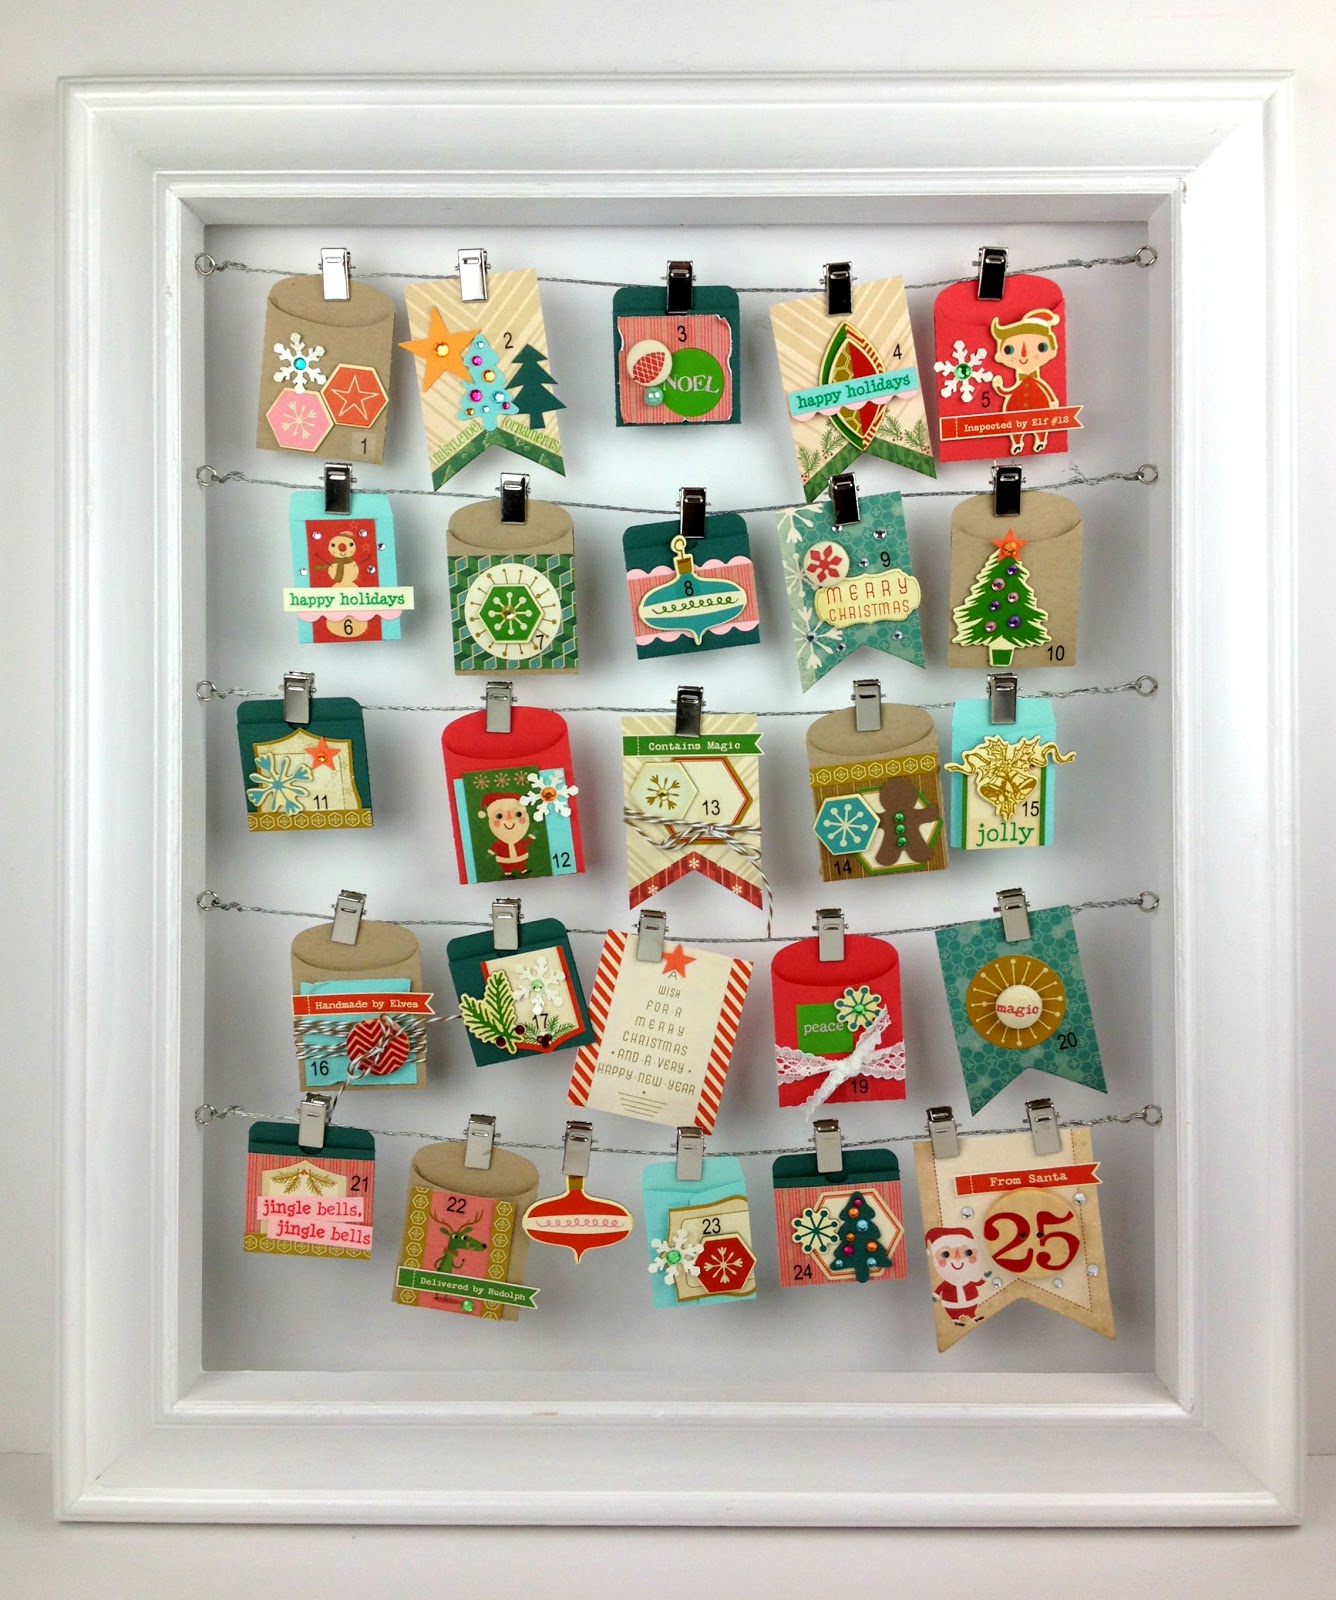
Silhouette Wood Frame Advent Calendar Limited Edition 2012

i was so excited when the email came through my inbox from Silhouette asking me if i'd like to play with the Silhouette Limited Edition Advent Calendar for 2012. it took me 2 seconds flat to make that decision....i mean, come on. that's a no-brainer! you may remember the one i altered last year--it became quite the popular re-pin on Pinterest. :)

(edited to add: Silhouette has told me that if you enter the code: BLACK at checkout, you'll recieve a 40% discount on your own Wood Frame Advent Calendar. YAY Silhouette!  my readers thank you for that! )

funny enough, i reached for Cosmo Cricket's 2012 Christmas collection (Jolly Days), SRM Stickers, and my Fiskars punches yet again.  what can i say, those companies never disappoint and i really dig their style.
the Silhouette Limited Edition Wood Frame Advent Calendar is such a stylish countdown to Christmas. but, it doesn't only have to be for Christmas.  i can see this being used as a countdown to a trip to Disney, or a birthday or anniversary....or even just to display some of your favorite photos. can't you?
the solid wood frame comes already painted white with wires already attached. you also get a free download card loaded with 20 shapes to help you create your advent calendar. you have full creative control over what this calendar looks like! just use your Silhouette and your favorite paper to customize the calendar in your own style.
this is one of those frames that will be so very useable even after the holidays. i plan on packing the little envelopes away with my Christmas decorations, then repurposing the frame with everyday photos printed from instagram and having it hang in my home all year long.
anywho. i had such a fun time altering it. it's pretty well known that i have a love affair with SRM Stickers. if you didn't know, i used to design for them and they pretty much stocked me up for life with a very generous supply. but, even if i didn't have gobs of these things, i'd be adding them to my shopping basket any chance i could get, i love them that much!  they have stickers for every ocassion and they are clear so they look more like a rub-on. i'll take that over frustrating rub-ons anyday. thank.you.very.much. :)
of course, i also had to get some good use out of my Fiskars punches.  i *adore* the Christmas seasonal punches. i've used them on gobs of projects the last two weeks and i'll be sharing those over the next two weeks with you. my favorite is the snowflake punch on envelope 23. i used it on several envelopes and punched it from glittered cardstock, but the sparkle is hard to relay in photos.

the easiest way to complete one of these projects is to grab a single collection and pull a few sheets of coordinating cardstock and just START.  then treat each envelope individually.  if you look closely, there is nothing stellar about each envelope on it's own. it's the sum of them all together that give this project the wow factor. just repeat colors, repeat embellishments, a little sparkle dispersed randomly in the way of glittered cardstock and adhesive backed rhinestones, some mild distressing, and sticker sentiments.
all in all, this project came together, including time to cut the shapes, in just about 3 hours. and yes, that includes interruptions (always).  really, really, so simple, and makes quite a powerful statement. and what i love most about this year's version is that it only used 3 sheets of cardstock, but still, because of the substantial size of the frame (guessing 18" x 24") it still packs a powerful punch.  compared to last year's version that used 35+ sheets of cardstock. 

psssttt......if you don't already have a Silhouette Cameo, there is a GREAT cyber monday deal at Scrapbook.com.  enter the code: SCMN6 to get $70 off instantly! 

and here's clickable links to all the products i've used to create this calendar.


(full disclosure: while i was not paid to create this blog post, just simply provided with the wood frame calendar, this post does contain affiliate links.)

LinkWithin

Related Posts with Thumbnails