
Showing posts with label recipes. Show all posts

Tuesday, August 14, 2012

Fiskars: Canning Labels + Salsa Recipe

some people go out to eat every weekend or order pizza in every friday.

us?  we have Taco Tuesday. usually. not always, but more often than not, if it's Tuesday, something mexican is on the menu.

it's quick, it's easy, and it's something that everyone will eat without complaint. BONUS! :)
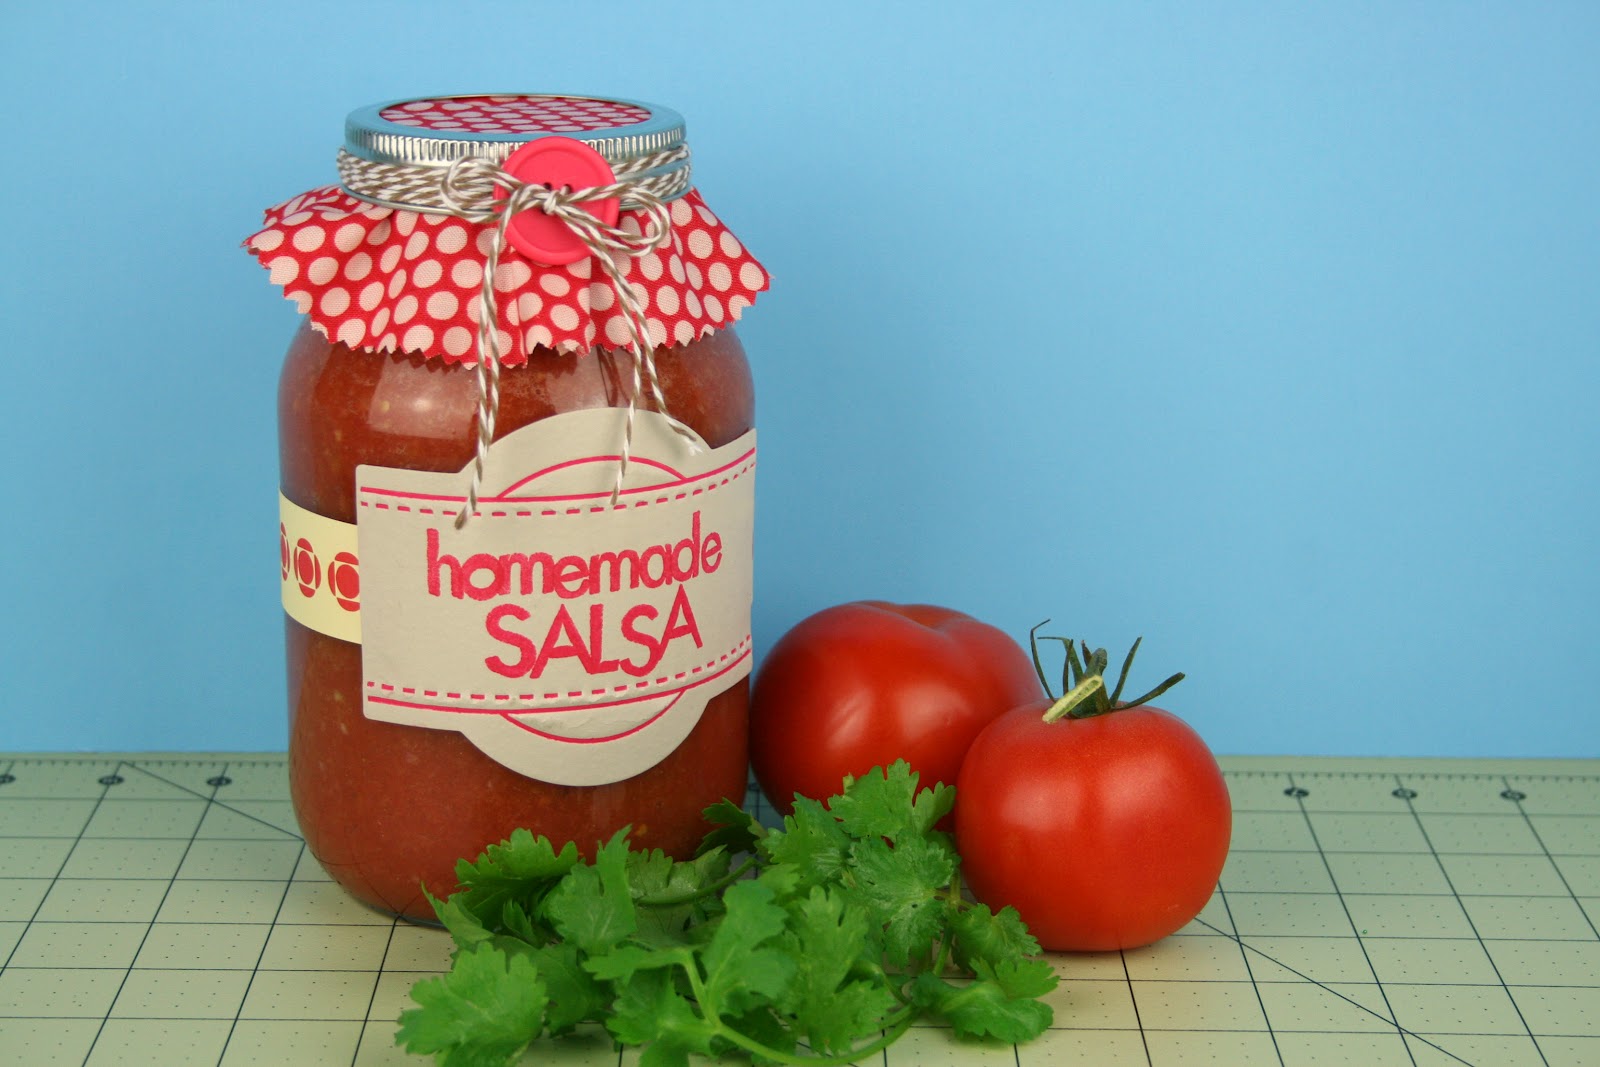

something that is sure to be made on Taco Tuesday is salsa.  we all love salsa and eat lots of it. once you make homemade salsa, you're sure to never buy storebought again. it's so easy and takes me less than 3 minutes. :)

we have a few trusty salsa recipes, but this one is our favorite.

here's what you'll need:
  • 2 (14.5oz) canned plain diced tomatos (if you want it to have some kick, use one can of plain diced & one can of diced with green chilies)
  • 2 cloves of garlic, peeled and minced OR 1 tsp. minced garlic (jarred)
  • 1 medium onion, chopped (we prefer red onion)
  • 1/2 to 1 tsp. cumin
  • 2 tbsp. vinegar
  • 1 tsp. salt
  • 1 tbsp. jalepeno pepper juice
  • 1 spoonful sliced, pickled jalepeno peppers (optional: for more spice)
(NOTE: if you're swimming in tomatos from the garden, substitute 10 - 12 fresh tomatos in place of canned. we prefer to use roma when using fresh.)

dump it all in a blender and pulse until you have the desired consistency. the kids don't like it chunky, so we nearly liquify ours.  sample the salsa with a tortilla chip before removing from blender to see if it needs more of something.  keep in mind after it sits a day in the fridge, the flavors will blend and become stronger.

if you get it a bit too spicy....add more tomatos! :)

now that you see how easy--and tasty--it is to make your own, why not whip up a batch to give to a neighbor or friend!?

then, before giving it, take 10 more minutes to dress up your jar with a canning label crafted by way of the Fuse Creativity System. :)

let me show you how: Canning Labels by Tania Willis


may all your mexican meals from here forward be graced with delicious salsa! ENJOY!

Friday, March 11, 2011

a little something fun to welcome spring...

my girls came home with these adorable handmade birdfeeders after school one day last week. they hopped out of the car and promptly begged to hang them on the tree to coax the few birds that returned for spring into our yard.

then they both started chattering a mile a minute trying to tell me all about the process for making them.


•Pieces of bread (any kind)
•Eggs
•Birdseed/Sunflower Seeds
•Two bowls
•Straw
•Heart Shaped Cookie Cutter (optional)
•Ribbon, String or Yarn
•A warm place or sunny window sill
•Some waxed paper

1. Crack two eggs into one bowl and stir with fork.
2. Bird seed into second bowl.
3. Cut bread into desired shaped with cookie cutter.
4. Dip bread into eggs, coating both sides. Don’t let bread soak up eggs and fall apart.
5. Dip into birdseed bowl, pressing down gently so seeds stick.
6. Put bread on waxed paper and poke hole 1/2" from edge with straw.
7. Allow to air-dry in warm place. (they said this took 2 days....you could probably speed it up in a low temp oven....like 200 degrees for an hour)
8. Once dry, tie ribbon through hole to hang.
9. Hang and watch birds enjoy!

it's the simplest things that excite them the most. :)

Wednesday, November 24, 2010

a holiday treat with SRM Stickers (& recipe share)


SRM sent the team some of their newest products---these wonderful clear tubes---that are perfect for a whole variety of things.

if you don't believe me, check out the last three days worth of inspiration over on the SRM blog. my teammates came up with some seriously rockin' ideas!

at just $1.00 per tube, they are so convenient for gift giving and party favors too. many of the SRM sticker sentiments are the PERFECT width for placing along the lid too. i've used stickers from the Express Yourself Recipes sticker sheet.

i plan on tucking both tubes into a coffee mug along with an ornament for teacher holiday gifts this year.
the product on the tag is last year's holiday collection, Jolly By Golly, from Cosmo Cricket. looks like it's still available for purchase on their site.

the back of the tag holds the recipe for the hot cocoa and what to do with the Andes mints. i like to melt mine into a cup of hot cocoa. Mmmmmmmmmm. pure bliss.

if you're a convience type person, you can easily fill these with the pre-package hot cocoa packets. two packets fit perfectly into one tube. (that's what you see in the photos above)

Recipe to make your own cocoa mix:
(this recipe makes a HUGE batch....plenty to share, plenty to keep)

1 large box of instant dry milk
11oz powdered non-flavored coffee creamer
1 (16oz) container of Chocolate Nestle Quik
1 c. powdered sugar
Mix and store in airtight container.

Fill mug 1/2 full with mix, add hot water. Stir and enjoy.
For an added treat, add 1 or 2 Andes mints to your hot cocoa.

this recipe is one i was introduced to via my step-mom and since discovering it, i struggle to drink any other cocoa. it's delish!

Wednesday, October 07, 2009

RECIPE SHARE: Breakfast Pizza

Photobucket

it's about time i share another recipe since i haven't done so in a while. i'm SO glad i've taken time to write some of these down, as my recipe cards seem to disappear overnight sometimes, LOL.

this is one of those meals that is in Ashlyn's top 3 favorite things to eat, and even though it is called Breakfast Pizza we often eat it for dinner. but, it's easy enough that you could have it ready, start to finish in less than 30 minutes (15 of that is bake time), in the morning.

it's super easy, economical, VERY yummy, and reheats well for breakfast the next morning.

Preheat: 400.
Sausage Breakfast Pizza
Ingredients:
1 lb. bulk pork sausage, cooked and drained
1 can of buttermilk biscuits (the cheap ones....not flaky)
4 eggs
2 TBSP milk
1/2 cup shredded cheddar cheese
1/2 tsp pepper
2 tsp oregano

Press uncooked biscuits into a lightly greased 9 x 13 pan, pinching the seams as you go. Spread sausage evenly over top. In medium bowl whisk together 4 eggs, milk and pepper. Pour egg mixture over top the sausage. Lift pan and tilt to allow egg to spread into all corners. Sprinkle cheese on top. Sprinkle oregano over the whole thing. Bake at 400 degrees for 15 minutes. Allow to cool 5 minutes before cutting. Serves 6 large portions or 8-10 regular portions.

tips:
*sometimes i heat pre-cooked sausage patties and dice them up after they are cooked instead of browning bulk sausage.
*we discovered last night that this is extra yummy with a small drizzle of warm maple syrup on top
*do NOT add extra eggs or you'll have a mess on your hands. it seems like there is not enough egg in it, but i assure you that 4 is the perfect amount.
*sometimes i use 1 whole can of biscuits AND a half can.
*you can substitute diced ham, but may want to eliminate the oregano if you do so.
*make two batches (in 2 separate pans) at once. it reheats well and my kids always eat seconds.
*i almost always serve mine with fruit to help balance the meal.

ENJOY!
Photobucket

Monday, September 28, 2009

weekend = apple pickin' & makin' pie

Photobucket

Photobucket

Photobucket

Photobucket

Photobucket

Photobucket

every year we drive to Lynd Fruit Farm to pick Jonagold apples, then come home and made homemade apple pie. just a small tradition we enjoy doing as a family.

if you've been out pickin' apples like we have (or you have an abundance from the grocery) and you want to make something delicious, i'm hoping this recipe will convince you to try (semi) homemade apple pie. semi homemade because i don't make my own pie crust.

i'm not a big fan of apple pie, in general, but this homemade apple pie is pretty irresistible and so worth the effort.

1. Gather your ingredients.
Photobucket

*ingredients listed are for ONE pie.
double if making two.
*

INGREDIENTS:
1 refrigerated pie crust (bottom only)

FILLING:
1 c. white granulated sugar
1/3 c. all purpose flour
1 tsp. nutmeg
1 tsp. cinnamon
dash of salt
8 cups peeled, sliced apples (5 large)

TOPPING:
1 c. all purpose flour
1/2 c. firm butter (or margarine)
1/2 c. brown sugar

2. Preheat your oven.
Photobucket

3. Wash, peel, de-seed and slice your apples and place in a medium/large bowl. Then dump all the filling ingredients (sugar, flour, cinnamon, nutmeg and salt) on top. Give it a good stir and let it sit and get all gooey while you do the next steps.
Photobucket

4. Cut your stick of butter into 1" slabs, place in a bowl. Add flour and brown sugar.
Photobucket

5. Using a fork, cut the butter into the sugar and flour.
Photobucket

6. Keep doing that until it the clumps are about pea-sized.
Photobucket

7. Place room temperature pie crust into an ungreased deep dish pie pan. Flute edges if you must (i'm not so good at this part). Then dump in the yummy, ooey, gooey apple slices.
Photobucket

8. Sprinkle the ENTIRE flour, butter, sugar mixture over the top of your apples. (forgive the picture with the topping still in the bowl and on the pie....kinda confusing i know..... i made 2 pies).
Photobucket

9. Line your bottom oven rack with aluminum foil (don't skip this, you'll be sorry if you do---dripping gooey all over your oven), then put pie in the oven for 50minutes.
Photobucket

10. After 50 minutes, cover the top loosely with aluminum foil and bake another 10 minutes. Don't skip this step either or your topping will burn.

11. Remove from oven to a cooling rack and cool 2 hours to allow it to set up before cutting.
Photobucket

Photobucket

Tuesday, December 09, 2008

RECIPE SHARE: Fruit Dip

Photobucket
ya'll don't mind if i do a little post and run today do ya? it's quite the busy morning round here, so hows about a recipe share and i promise to make up for the lack of a real post tomorrow? okay. thanks. i knew you'd understand.

oh, wait, before i run........a few things.
1. Welcome all new readers making their way from Heart of the Matter. Make yourself cozy, poke around a bit, and email me if you have any questions.

2. Meghan warns......don't try to melt crayons in the microwave. big no-no. you'll be sorry if you try. Meghan, i must confess.....just the thought of it made me laugh. Don't hate me. heehee.

3. Sharyn thinks she's boring, but i think just the opposite. She's always melted down all of the same color broken crayons to make chunks of yellow, or red, or.......you get the idea. Especially a good idea for chubby toddler hands still learning colors. Why didn't I think of that!?

4. Yo-Yo Balls.........don't try ToysRUs. they are SO not helpful. GO TO TARGET at the checkout lanes. They have GOBS and GOBS of them! $3.99. So even a dollar less than that not so helpful toy store. I even grabbed an extra to put with a giveaway in the next few days! I'm helpful like that. *smile* Aren't you excited? LOL.

5. Someone asked.......did you make that monkey on your sidebar? why yes.........i did. AND, you can too. Join me in January at debbiehodge.com for my online class called Embellishments: Beautifully Handmade and learn exactly that, how to make your own embellishments for a fraction of the cost of purchasing the mass-produced, overpriced ones. More on that later.....but registration is open now!

okay, the recipe:
FRUIT DIP
1 container yogurt....flavor of your choice, i prefer strawberry (4 or 6 oz is fine)
3 oz of cream cheese, softened
1 small jar marshmallow creme (i think it is 7 oz.)
8 oz cool whip, thawed

Combine cream cheese and marshmallow creme on medium speed with your mixer until smooth. Then fold in yogurt and cool whip. Serve with bite-sized pieces of fresh fruit. Also tastes great with pretzels dipped in it.

This recipe is perfect for a Christmas morning brunch. It also packs well in a lunchbox with some fresh fruit. Also, I have substituted go-gurt tubes in place of the yogurt....just use 2 tubes.

ENJOY!!!
********************************
the winner of debbie's book is: Robin V. Robin, please email me at taniamwillis at (yahoo.com) with your mailing address and i'll get the information to debbie so she can mail out your book!

16 days until Christmas!!! are you in a panic yet? i'm totally NOT. i'm so enjoying this holiday season. we've only purchased a few things, and we've focused a LOT on just being together.

today's giveaway is: a 4 in 1 stamp kit. inside is a full set of stamps like the alpha shown on the front and a CD that has digital patterned paper images, fonts and more. AND a few sheets of epoxy stickers and a coordinating set of alphabets!
Photobucket
Photobucket

Wednesday, November 26, 2008

RECIPE SHARE: Loaded Potato Soup

Photobucket
mmmmmmm, this was the scene last night at my house. snuggled in a blanket and served dinner by my husband. ahhhh, life is good.

this is by far my favorite winter food ever. definitely a staple on our menu. but what makes it even better.......you make it in the crock pot!

wanna taste? it's super simple, you should give it a try. and for all my new readers, here's a link to all the other recipes you can't live without--trust me. Tania's RECIPE Box.

Loaded Potato Soup
Serves 12.
8 cups peeled, diced potatos
1/3 c. chopped onion (i just use a whole large onion)
3 cans (14 oz) chicken broth (or 6 cups water & 6 chicken bouillon cubes)
1 can condensed cream of chicken soup
1/4 tsp. pepper
8 oz. cream cheese
1/2 lb. bacon, cooked & crumbled
chopped green onions
shredded cheddar

In a slow cooker/crock pot, combine potatos, onion, chicken broth, soup and pepper. Cover & cook on low for 8 hours (or high for 4). Add cubed cream cheese, stir until blended. Serve garnished with bacon, cheese and green onion. Easy peasy. ENJOY!

and the winner of yesterday's giveaway..........TONA. email me please at taniamwillis at (yahoo.com). i haven't heard from Marla yet. and up for grabs today:
BRAND NEW RELEASED PRODUCT from Little Yellow Bicycle. Lucky you, i got duplicates!
Photobucket
here's a full view of the rub-ons--it's a 4" x 12" sheet.
Photobucket
Photobucket

Sunday, November 09, 2008

RECIPE SHARE: Pumpkin Spice Cookies

my appologies to all my readers who are trying their darndest to lose pounds. click away now, lest you be tempted, don't say i didn't warn you, LOL. but i honestly won't be able to sleep tonight, knowing that i haven't shared the deliciousness that is these cookies.

seriously, after eating one (or two or three.....or four) of these, there'll be a party in your tummy! Mmmmmmmm.
Photobucket
(sorry for the poor quality photos...i'm lacking in the photoskills department lately.)

PUMPKIN SPICE COOKIES.
Preheat oven to 350 degrees.
Ingredients for cookies:
2 1/2 cups all purpose flour
1 tsp. baking powder
1 tsp. baking soda
2 tsp. cinnamon
1/2 tsp. nutmeg
1/2 tsp. cloves
1/2 tsp. salt
1/2 cup butter, softened
1 1/2 cups granulated sugar
1 cup canned pumpkin puree
1 egg
1 tsp. vanilla extract

Cream Cheese Frosting:
1, 8oz. bar of cream cheese
1/4 cup butter, softened
2 cups powdered sugar
1 tsp vanilla
1 tablespoon milk (optional)

Preheat oven to 350 degrees. Combine flour, baking powder, baking soda, cinnamon, nutmeg, cloves and salt; set aside. In medium bowl, cream together butter, sugar. Add pumpkin, egg, and vanilla; beat until creamy. Mix in dry ingredients. Drop by tablespoonfuls onto cookie sheet, flatten slightly. Bake 15-20 minutes. Remove to cooling rack. For icing, beat together cream cheese and butter. Add powdered sugar and vanilla. Add milk to thin icing if necessary. Spread icing on cookies after they are cooled. Store in refrigerator because of cream cheese icing. EnJOY!
Photobucket

Tuesday, September 23, 2008

(Semi) Homemade Deep Dish Apple Pie

1. Gather your ingredients.
Photobucket
INGREDIENTS:
1 refrigerated pie crust (bottom only)

FILLING:
1 c. white granulated sugar
1/3 c. all purpose flour
1 tsp. nutmeg
1 tsp. cinnamon
dash of salt
8 cups peeled, sliced apples (5 large)

TOPPING:
1 c. all purpose flour
1/2 c. firm butter (or margarine)
1/2 c. brown sugar

2. Preheat your oven.
Photobucket

3. Wash, peel, de-seed and slice your apples and place in a medium/large bowl. Then dump all the filling ingredients (sugar, flour, cinnamon, nutmeg and salt) on top. Give it a good stir and let it sit and get all gooey while you do the next steps.
Photobucket

4. Cut your stick of butter into 1" slabs, place in a bowl. Add flour and brown sugar.
Photobucket

5. Using a fork, cut the butter into the sugar and flour.
Photobucket

6. Keep doing that until it the clumps are about pea-sized.
Photobucket

7. Place room temperature pie crust into an ungreased deep dish pie pan. Flute edges if you must (i'm not so good at this part). Then dump in the yummy, ooey, gooey apple slices.
Photobucket

8. Sprinkle the ENTIRE flour, butter, sugar mixture over the top of your apples. (forgive the picture with one pie and the mix not on it....kinda confusing i know. i made 2 pies).
Photobucket

9. Line your bottom oven rack with aluminum foil (don't skip this, you'll be sorry if you do---dripping gooey all over your oven), then put pies in the oven for 50minutes.
Photobucket

10. After 50 minutes, cover the top loosely with aluminum foil and bake another 10 minutes. Don't skip this step either or your topping will burn.

11. Remove from oven to a cooling rack and cool 2 hours to allow it to set up before cutting.
Photobucket

ENJOY!

Sunday, September 07, 2008

chocolate covered frozen bananas.

hello friends! just thought i'd share a fun after-school activity/snack that you and your children are sure to enjoy! it's quite simple.......and a fun recipe to help young kids build confidence in the kitchen. and they also make a GREAT gift!

first you'll need to gather your supplies: bunch of fresh, firm bananas (really ripe bananas make this project a mess), magic shell ice cream topping - chocolate fudge flavor, craft popcicles sticks (they even have these at walmart in the craft department), waxed paper, a cake pan or other shallow dish, butter knife. (NOTE: if you are making more than 10 you'll need a second bottle of magic shell. also, NEVER refrigerate your magic shell. the cold temperate makes the chocolate harden.)
Photobucket

1. Peel your bananas, cut them in half, then insert your popcicle stick into the cut portion of the banana. Insert the stick slowly and along with the curve of the banana so you don't have any mishaps during the eating stage. This also helps prevent the banana from breaking apart.

2. Place your bananas on a stick in a waxed-paper lined dish and put in the freezer for at least 4 hours........i do mine overnight. You could do this step after dinner and then it will give the kids something to look forward to after school the next day.
Photobucket

3. Remove bananas from the freezer, then shake your magic shell vigoriously for 2 MINUTES. do not skip the shaking step.
Photobucket

4. Gather your supplies: a medium to large plate, butter knife, waxed paper lined dish or cookie sheet. Then, squirt out a small puddle of chocolate onto a plate.
Photobucket

5. Then holding the popcicle stick like so, and start drizzling the magic shell where the stick meets the banana. (NOTE: you'll need to work quickly because the chocolate pretty much freezes within 30 seconds of contact.)
Photobucket

6. Continue drizzling until you have decent coverage.
Photobucket

7. At this point, roll the entire banana in the puddle on chocolate on the plate.
Photobucket

8. Use a butter knife to apply to the areas that won't cover easily.
Photobucket

(NOTE: if you work quickly enough, at this point you can roll the chocolate covered banana in crushed walnuts, or add sprinkles, or crushed oreos...........whatever you prefer.)

9. And here's your finished banana.
Photobucket

10. Lay it on a waxed paper covered cookie sheet or baking dish until you have them all covered, then return to freezer.
Photobucket

You can very easily gift wrap these to give as a gift as long as you have a way to keep them frozen. I simply snip off the zipper seal portion of a sandwich sized ziplock bag, insert the point of the banana into the bag toward one corner, then gather the excess baggie around the stick and tie closed with ribbon. Then, i line a shoe-box sized gift box with tissue paper and lay the wrapped bananas inside, put the lid on the box and top it off with a wide ribbon closure and add a card or gift tag.

LinkWithin

Related Posts with Thumbnails