Showing posts with label sewing. Show all posts

Tuesday, January 29, 2013

Team T-Shirt Pillow Tutorial


hello, friends! i know it's been a while....nearly 2 months, in fact. i'm sorry for that. things get a little crazy around here during the holidays along with the Craft & Hobby trade show that immediately follows.  but i'm getting reacquainted with my pre-holiday schedule and hope to bring more to this internet space of mine soon.

in the meantime....it's a good time to show your team spirit!  i challenge you to spruce up your husband's (or son's) man cave or just make some fun conversation pieces for that Superbowl Party you're planning this weekend. i happen to think these would also be quite popular with the college crowd to add a little fun to their dorm room decor.

anywho. these pillows are made with upcycled team t-shirts and whip up super quick. and guess what?  i have a tutorial to show you exactly how to get from start to finish over Fiskars.com: Team T-Shirt Pillow Tutorial
 
not a sports fan?  no worries. you can use any t-shirt, it doesn't have to be sports themed! 

this is especially perfect for those shirts you fall in love with on the clearance rack or at the thrift store, but inevitably aren't your size. :)  buy it anyway and turn it into a pillow!

t-shirt pillows are especially perfect for decorating a child's playroom or bedroom since they are easily washable.

happy creating & be sure to show me your finished pillows!

Monday, October 08, 2012

Fiskars: Pantone Inspired Scalloped Table Runner Tutorial


as y'all know, i'm a Fiskars Crafting Expert, and as a benefit of my job, i receive Fiskars tools.  but long before i became a Crafting Expert, i purchased what quickly became my favorite border punch--the Threading Water Border Punch.  i fell head over heals with that thing using it any chance i could get.

what can i say? i was smitten with the scalloped edge.  i *adore* scallops---the dainty curved kinda...NOT the stinky fish kinda!  me no likey fishy, lol.

anywho. i recently spent some time, in short little bursts, hovered over my sewing maching in an attempt to pull off an idea i've had in my head for some time.  the idea?  to create a scalloped border running down two sides of a center strip for a table runner.

and by golly.......it worked and i have a tutorial to prove it!

there's a super easy technique that makes this seemingly tedious project very simple and very do-able. all you need to complete this trendy scalloped table runner is a few simple quilting tools, fabric, and a long weekend making friends with your sewing machine---oh, and an ironing board!

to make it even more fun, i pulled my color scheme for this project from Pantone's Fall 2012 Color Report!


click on over to the Fiskars website for the complete tutorial: Scalloped Table Runner by Tania Willis

Wednesday, October 03, 2012

FISKARS: Jellyfish Costume Tutorial

we all love to watch children embark on little imaginative adventures during creative play, yes?  since my girls were just itty bitty i've enjoyed scouring thrift stores and clearance racks after the holidays to bulk up their dress-up bin.  we currently have an entire closet devoted to dress-up clothes---i really should cull through it and hand down the outgrown ones to younger nieces....and nephews too, because we have plenty of spiderman and mario brothers. LOL.  (spidergirl keeps reminding me that she no longer likes spiderman *sigh*. i suppose that means i need a new nickname.)

anywho.  my girls are getting older now and the store-bought costumes are just a little two cutsie for them these days.  now's when mama's sewing skills will be put to good use with some handmade costumes.  i'll take that! 

i've been waiting for these days when what i make is cooler than anything they can find in the stores!

so, what was the first costume to tackle?  why, a jellyfish, of course!  ashlyn and i saw a little girl dressed as a jellyfish several years ago now and we haven't forgotten about it since.  so, this year, i was determined to mark another 'things to make someday' item off my list. you have one of those lists too, don't you?
i'll tell you what, the hardest part of this costume was finding a suitable umbrella in the middle of summer.  not such an easy task here in ohio.  the funnest part was shopping for the material!  we ended up getting a glittered/beaded organza fabric to drape/stitch over the umbrella.  i wish you could see how delicate and beautiful it is.  my pictures don't do it justice at all.
this is one of those costumes that is sure to turn heads whether you’re using it for trick or treating, a costume party or just something playful to add to the dress-up bin. if you have a basic knowledge of how to work a sewing machine, you should do just fine with this project.  but, what i love most about it, is how easy it is to put away for storage until next time you need it.  since the base is an umbrella, it collapses quite easily.

i created a step-by step tutorial of this costume for Fiskars.  see the complete project here: Jellyfish Costume Tutorial.

if you give it a try, promise to show me your end result? as always, you may email me with any questions along the way.  :)

i can't wait to watch the magic unfold on trick or treat night as her jellyfish dances gracefully through her imaginary sea as she floats door to door greeting friends and neighbors. 

Tuesday, February 28, 2012

Fiskars: Make Your Own Puppet Theatre Tutorial

what child doesn't like to stuff their hand into a puppet and let their imagination run wild with a storyline from fantasy land behind a puppet theatre curtains? very few, i'd guess.

puppets are a great way for a child to stretch their imagination on those days that can't be spent outdoors. and what do you need when you play with puppets? why, a puppet theatre, of course!

i'm sure you've seen some of the prices on those things........wowza! it's definitely one of those things that you can make yourself and customize to your needs for a major fraction of the cost of a ready-made. and it's really easy too!

click on over to the Fiskars website: Puppet Theatre Curtain where i walk you through step by step on how to make one of your own.

and if you aren't able to sew one with a machine, you can always substitute the iron-on hem tape in place of stitching the seams! no excuses now----go make one for your kiddos and be prepared to sit back and watch hours and hours of puppet shows unfold.

Tuesday, November 29, 2011

TUTORIAL: Make Your Own Monogram Pillows

as you've noticed by my lack of posting, i've been a bit busy! part of that busy always involves time in the studio, of course. :)

i'm excited to share a tutorial, along with a few variations, for making your own monogram pillows. i've been crushing on the popular number and ampersand pillows for at least a year now but dang are those things expensive.

so instead, i decided to make my own and show you how in the process!


you can find the instructions over on the Fiskars site by clicking: Monogram Pillows by Tania Willis

and in case you missed it, the instructions for the Yo-Yo pillow (shown in the photos above) can be found there too: Yo-Yo Pillow by Tania Willis

both would make excellent Christmas gifts!

speaking of Christmas gifts.....you don't want to miss these other projects by some of my favorite designers:
Miniature Embroidery Hoops by Emma Jeffrey
Four Scarves by Emma Jeffrey
Holiday Gifts for Teachers by Lisa Storms
Creative Gift Wrap by Lisa Storms
Handmade Christmas Gifts by Emma Jeffrey
DIY Gift Spa by Katrina Simeck
Holiday Gift Toppers by Laurie Cinotto

ENJOY!

Thursday, November 10, 2011

Fiskars: weekend sewing with kids

are you looking for ideas on how to keep your kids occupied during their upcoming holiday break? if so, why not consider making a new tradition where you take on a sewing project that you work on together each and every 'holiday break'?

i've done exactly that with my children making dresses, and blankets, and pillows, and now........Christmas Stockings. :)

i've learned that kids love to help, they love to learn, and they love knowing they have a skill that isn't taught to most kids their age.

you can read about our latest sewing adventure together--making the stockings--in my latest Fiskars article by clicking over: Article on Christmas Stockings by Tania Willis


if i haven't convinced you after reading the article that there is a place for children to be involved with a sewing project, here's...

...4 simple reasons why i think it's important to involve children in your sewing & crafting projects:

1. To teach them a life-long skill.
Mending and hemming clothing can get quite expensive. Teaching children a skill to do these things on their own builds their confidence and self-esteem.

2. Teaching opportunities, beyond how to sew, abound.
Children are like little sponges, constantly soaking up every thing they see and hear. While teaching them to sew, not only do you have the chance to teach them a life-long skill, but the opportunity for reinforcing family values and educational lessons is also present. You can teach resourcefulness by using recycled materials, how to create your own pattern templates, & making do with what you have on hand. Younger children can test their AB or AABB pattern skills, while older children practice measurement & fraction skills.

3. Enhance their creative thinking and problem solving skills.
Sewing projects always come with a number of challenges, whether it be how to arrange the materials in a pleasing manner or fidgeting with a finicky bobbin in the sewing machine. Through these challenges children will learn patience and learn how best to put their creative thinking and problem solving skills to use as they work on solving the problem.

4. Instill a sense of accomplishment.
After finishing a project....which is more about the process for children than the end result---you'll notice they stand a little taller with their chest inflated just a little fuller as they happily proclaim..."I helped make this."

if you start a new 'holiday break' sewing tradition with your children, i'd love to hear about it and see your finished projects! you can email me or share a link here in the comments.

Tuesday, September 13, 2011

FISKARS: Ruffled Canvas Totes

i'm excited to share with you another project i created for Fiskars. i'm so loving working with their amazing tools and having the opportunity to create some projects that have been on my "want to create" list for a long while.

and i'm especially loving making friends with my sewing machine again! oh, how i've missed it.

my latest sewing adventure? these ruffled canvas totes....

i'm officially addicted to making them and you can be too! the full project instructions are available on the Fiskars website: Ruffled Canvas Totes.

they are super fun and make and even more fun to give as gifts! we've already given this rosette, single ruffle tote to the nurse at emma's allergist who we see every week for her allergy shots. she looooved it.

i get asked often how i learned to do all this creative crafty stuff and i always say "i don't know, i just know how." LOL.

i've been sewing since i was 19 on an old hand-me-down machine. it helps that my personality type is one where i'm always willing to take on a challenge and learn as i go, honing my skill along the way.

so, the truth is, i'm self-taught through trial and error and also years of hovering over my grammy's shoulder watching her put her foot to the pedal to make the magic happen. i've made quilts, and clothes, and wall hangings, and formal dresses in years past, but my machine has been lonely for a while sitting in the corner.

but not any more.

i've got lots more fabric projects up my sleeve. :) having an attitude of "i can do that!" has been such a blessing and i'm so thankful for it.

so, i'm wondering how many of my readers sew...do you?

Monday, August 29, 2011

FISKARS: Yo-Yo Pillow

this is a project that i've had in my head waiting to come out for a super long time, but i've never made the time to do it. but, i'm SO excited i finally got to do it with the help of some amazing Fiskars tools. and now, i get to share it with you! :)

if you've been a blog reader for some time, or in any of my Embellishments: Beautifully Handmade classes, you know how incredibly obsessed i am with making yo-yos.

they are so easy to whip up, super pretty. and they give me a good excuse to do some more shopping at the fabric store. heee.

so that pretty pile of fabric circles, quickly turned to these...

and 25 of those got handpicked and placed like this....then, stitched down and turned into this pillow...

which is hands-down my most favorite thing i've ever made, EVER!

come find out how to make your very own Yo-Yo Pillow, step-by-step-by-step. it's my most recently featured project over at Fiskars!

it's a completely FREE tutorial...........what'cha waitin' for!?!


Monday, July 27, 2009

sunday. the day i got a hankerin' to make something pretty...with fabric.

first, i don't want to forget to let TONA know that she was the lovely winner of the newly released Karen Foster goodies. use that link over there to email me your address sweetie and i'll pass it along to the warehouse!

******************

Photobucket

i was so excited to head into a weekend with absolutely nothing on my calendar--no appointments, no deadlines, NOTHING. that's a very rare thing indeed.

BUT, by mid-day saturday, i was BORED out of my mind. nothing to focus on equals immediate boredom in my book. clearly i need a class to teach me how to relax and.......just be. after a whole morning of being lazy and putzing around here, cleaning a little there, and watching a movie, i decided to go to the fabric store while doug put the girls down for a nap.

Photobucket

it was the most glorious 2 hours alone in a loooooooong time. i think i heard the angels singing!

i came home to the girls bickering over that darn blue rasberry jolly rancher, so plan A (sewing) was quickly ditched for plan B (gingerbread house making) to rid this house of all remaining candy, LOL.
Photobucket

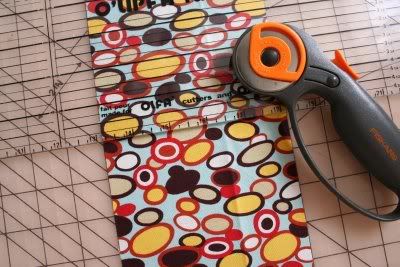
but, sunday morning, i woke up jazzed to start sewing. i've been wanting to make another quilt for at least the past year, but my schedule just hasn't allowed for it. being the instant gratification person that i am, i really have no patience to drag something out for a whole year, LOL. the eagerness to begin a quilt grew while watching Torm and Steph follow along with the quilt-along hosted by The Old Red Barn Co. someday, i'll make one of those lovelies.

but, in the meantime, i came across this lovely tote bag tutorial on Kim's blog and knew instantly---that's the project i need to do! small, fairly simple, no new techniques that i haven't really tried before (except the box pleat).
Photobucket

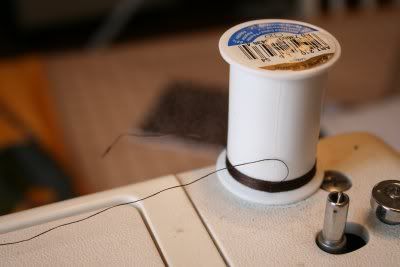
and i got busy. for an hour or so. well.............until, i ran out of thread. *sigh* i bought a light blue, but later changed my mind to brown. mistake #1.
Photobucket

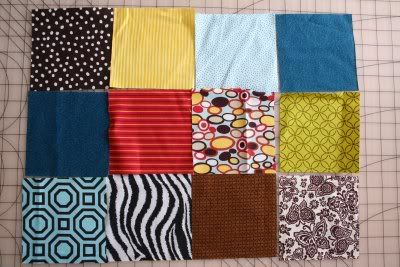
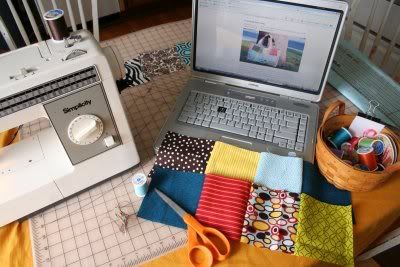
i got all 12 charm squares for side A and side B laid out in the order i thought looked best. taking a picture of them always helps me see it from another perspective. i sometimes do that with my scrapbook layouts before adhering everything down. i think i moved a few of the squares around after seeing this photo. the bottom right corner needed grounded with a stronger color.
Photobucket

Photobucket
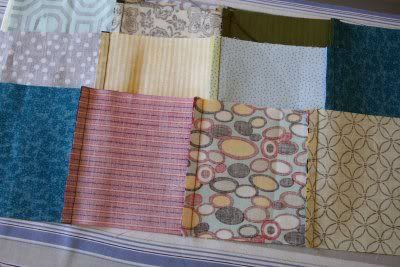
then, i got them sewn together, ironed out (is it iron open OR iron to one side when quilting?), batting added, and then both sides quilted---take that THREAD! ha.

i used this new (to me) batting that is fusible. BRILLIANT! that stuff is fantastic!

it felt kinda strange sitting at the table sewing with a laptop by my side instead of a book or chicken scratched notes from my Grammy Lou (my mom's mom). most of the tips and tricks i've learned about sewing have come from many years of sitting beside her when i was a kid watching her make the sewing machine sing. i'm thankful to have 2 quilts made by her in my possession. but i'd be more thankful to have her here by my side telling me what in the world i screwed up on this tiny project. LOL.

so i could ask her....how's come my charm squares don't line up as pretty as kim's? hrmph! it's been a loooooooong time since i sat down at the sewing machine. long enough that i think i forgot some of the most important rules for quilting. i need someone to remind me apparently. i mean, really, how hard is it to cut perfect 5" squares, sewing them all with the same seam allowance and then not have them match at the seams? too hard for me apparently. but the wonky seams are what makes it charming, right?

i hope so.

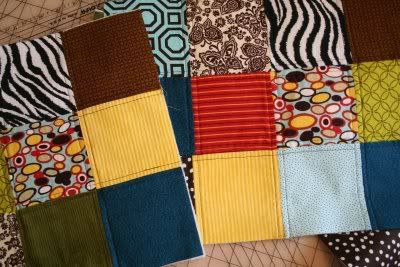
here's what i ended up with just before running out of thread. so the project is put aside until i can pick up a new spool of brown.
Photobucket

part of my problem was adding a corduroy to the mix. corduroy is notorious for slipping while you sew your seam. oh well. lesson learned. i'm sooooooo glad i took the time to make this little project before tackling another quilt. it's saving me hours of ripping (longer) seams and helping me brush up on my skills a bit.
Photobucket
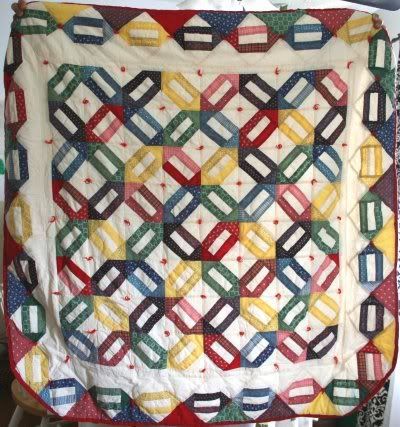
someday i'll make another quilt. it's hard to believe that i made my first quilt when i was just 19 years old. again, without Grammy Lou here to help me. i think she needs to move back from Florida already.

it's still my favorite sewing project i've ever made. it was the Cracker Quilt pattern. soon enough i'll make another one. but not before i work out all the things i've forgotten on this tote bag. it might be a hot mess by the time it's all said and done, but surely it will be a beautiful mess. those are my favorite kind of messes.


Photobucket

LinkWithin

Related Posts with Thumbnails