Showing posts with label teaching. Show all posts

Saturday, February 26, 2011

recording the hard stuff....

so, this post is all about that announcement i mentioned the other day.

are you ready for this?


i'm preparing my heart and mind to walk beside lots of hurting friends to help them get their memories preserved as i open up enrollment to teach another round of a class i developed called: In Loving Memory.

ETA: (ps....if you're a past student of this course you will be grandfathered into the class with no charge. it's as simple as filling out the Move My Class form found here and check off 'In Loving Memory' as a past class.)

i know many of you have been waiting for this announcement for a while based on the emails i've received requesting to run again. i'm excited to help you get these memories documented.


We all know that the loss of a loved one can be one of the most trying and emotional experiences in your lifetime as you ride the waves of grief that follow that loss.


This is something I personally discovered after losing my mom, very suddenly and quite unexpectedly, in the summer of 2007. yesterday, she would have turned 54.

After such a loss, when the grief washes away and the sunshine begins to peek into your life again, you find yourself left with a pile of memories that seem fleeting. Yes?

These seemingly fleeting memories leave you with a desperate urge to document every little detail of your loved one and the life they lived, but the thought of tackling such a task seems daunting. I've found that the sense of urgency is caused by the overwhelming fear that you'll forget before you have adequate time or energy to recount the life of the loved one you now miss so dearly.


In my online course, In Loving Memory, I will provide you with an abundance of starting points and journaling triggers, as well as layout samples and sketches to get you moving forward on making your own album of remembrance--all the while encouraging you to be gentle to yourself along the way.

This is definitely not a race to a finished album, but a process of documenting and healing all in one. It's scrapbooking as therapy, not just art.

If you'd like to record and honor the life of your loved one(s), and it has seemed too painful, too messy to begin, or just unapproachable, please consider joining me on a journey of remembrance this spring.

Class starts March 14th.

As a special promotion, the first 50 students to register prior to March 2 can receive 15% off registration with the code "EarlyBirdILM2011".

If you have any questions please leave them in the comments or email me. I'm happy to help you decide if this class is the right fit for you.

gentle hugs,
tania

Monday, August 09, 2010

ANNOUNCING: Beautifully Handmade: e-book series

now all 3 classes in the Beautifully Handmade series i taught at Get It Scrapped! are available in a download now, e-book format!

they can be purchased individually at $20 per e-book, or in a bundle with a 20% discount on pricing--just $48 for all three!


if you've been reading for any length of time, you know how passionate i am about teaching this series. and all those that missed taking the classes the first go-round don't have to wait any longer!

for those of you not familiar with the series, here's a breakdown of each e-book available in the Beautifully Handade series.


Photobucket

Photobucket

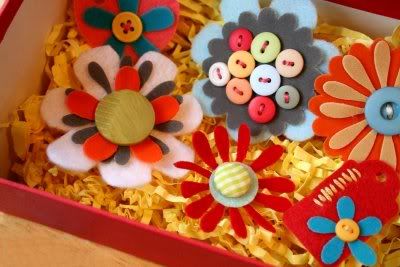
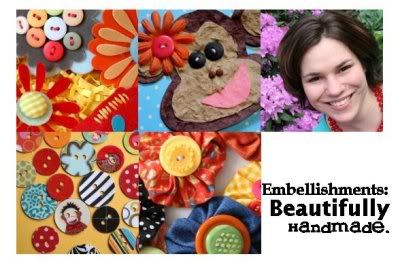
Embellishments: Beautifully Handmade is a jam-packed 100+ page e-book wherein, I share a wealth of ideas, inspiration,and step-by-step tutorials for hand-making custom embellishments. These embellishments are not only fun, unique, and beautiful, their cost is a fraction of what you'd pay for ready-mades. You'll learn how to make your own flowers using fabrics, felt, dollar store finds, patterned paper scraps, buttons and brads. I will take you through the process of paper piecing, making the ever-popular epoxy buttons, journaling spots and much much more!

This e-book includes 10 packed chapters teaching you not only how to make gorgeous handmade embellishments but also how to select and prepare materials for maximum yield at minimum cost. Spend less money and add beautiful, original handmade touches.

Scrapbooking with Fabric is a jam-packed 100+ page e-book wherein you'll learn how to add the warmth & texture of various textiles to your scrapbooking projects. You will learn a diverse range of techniques for adding fabric in big and small ways. Not only will you have increased confidence in yourself in using various store-bought fabrics, but you’ll also learn how to incorporate meaningful fabrics as the focus of your layout. As always I will having you pushing the boundaries of your creativity, while encouraging you to reduce.reuse.recycle castoff fabrics to make them useful again.

Even if you think you “know” fabric, you will find new ideas for using it on your pages and projects in this e-book. In “Scrapbooking with Fabric” you’ll be taking more than needle and thread to the page–you’ll be working with stiffeners, inks, stablilizers, adhesives . . . and even crayons!


Cards: Beautifully Handmade is 100+ pages filled full of card ideas for you to use up your scraps to make greetings that will touch the hearts of your friends and family.

From postal service regulations to envelope ideas: I cover everything you need to know about making and sending cards — beginning with USPS postal regulations for size and shape of standard cards vs. non-standard cards, moving on to unique folding techniques, shapely cards, transparent card and then I get funky with envelope décor that is sure to make your recipient smile!

You also learn much about my creative process and formula for QUICKLY making LOTS of cards that are all DIFFERENT. It’s my “secret formula” – that won’t be secret to you any more.

******************************
there are many more details on what's included inside the pages of each Beautifully Handmade e-book. clicking that link will take you to the Get It Scrapped! store where you'll see all three books and a more detailed breakdown of each book's chapters with descriptions.

as always, if you have question prior to purchasing, please leave a comment or email me using the link under my photo to the right.

Tuesday, February 16, 2010

video peek into Embellishments: Beautifully Handmade

thank you all so very much for the sweet comments & congrats regarding my post yesterday. i'm very lucky indeed. and i love getting to share it all with my blog readers.

today, i'm going to try to stay warm while surviving yet another winter storm that has piled 9 inches on top of what the last two storms dumped. eeeks!

i wanted to mention that if you're still sitting on the fence on whether Embellishments: Beautifully Handmade is something you want to invest in, this video will give you a little peek. in just three minutes, you can see peeks, how classes are posted & what kinds of things are discussed. the video was put together by Debbie Hodge, owner of Get It Scrapped! thank you Debbie!


the Embellishments: Beautifully Handmade class starts TODAY!

it's not too late to register. with 10 lessons at $25, that's only $2.50 per lesson!

if you took the class the first time around, i welcome you back--free of charge. just contact Debbie through the home page and let her know you'd like to join in again.

if you have any questions, please send me an email. use the link over there under my photo.

Photobucket

Sunday, February 07, 2010

TUTORIAL: Altering Fabric with Reinker Drops

Photobucket

In today's lesson:
  • Making your Own Spray Mist
  • Using Re-inker over a Resist on Fabric
After this lesson, you'll no longer be of the mindset that bleaching fabric or dyeing fabric is the only way to alter it. Although, both of these methods are acceptable ways to alter your fabric, and both can be done with great success using the proper products.

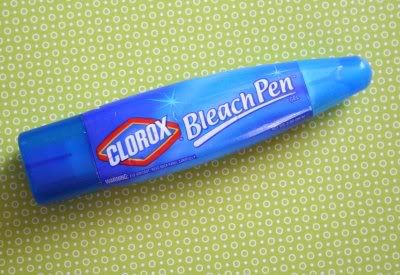
For example, if you wish to bleach a portion of fabric for use i your scrapbooking layouts, I highly recommend using the Clorox Bleach Gel Pen so you have more control over where your bleach lands. A super fun technique to try is painting some of the gel (a little goes a long way) onto bubble wrap and "stamping" it onto your fabric to create a bubble pattern that will bleach out the stamped portion of your fabric. Once the bleach dries, the fabric can be used directly on your layouts.
Photobucket

Today, though, I want to focus more on two fun little fabric projects using reinker drops.

re-inker
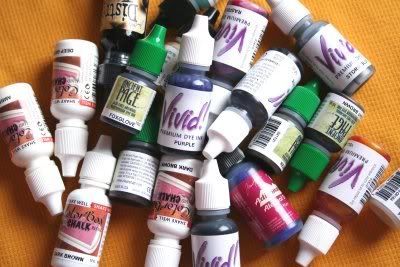
It seems only natural that if you can use dye and bleach on your fabrics, that you'd also be able to use re-inker. Re-inker is a dye solution sold as an economical alternative to buying a whole new inkpad. With just a few drops you can add new life to a dry stamp pad. But, I've found that it has many other uses, especially when playing with fabrics for your layouts. Although, I will warn you, doing so, is just a bit messy and takes some special care to heat-set and time cure. It is so very worth the mess--and the waiting--for the end result.
Photobucket

make your own spray mist

A very popular trend right now is to use spray mist. But, boy, can buying all those individual colors add up! I decided to try using what I already had on hand--re-inker--to see if I could get the same results. It worked!

All you need is a fine-mist water bottle, which is easily found in the travel-sized section of your toiletry aisle (usually for less than a dollar), paired with a few drops of re-inker. It's the frugal way to come about your own colored mist that is so popular among those who scrapbook, art journal and avid stampers!
Photobucket

Here's how:
  1. Fill small fine-mist spray bottle with 1/4 cup or less of water.
  2. Drop 2-3 drops of reinker into water. (Use more for more vibrant color, less for lighter color)
  3. Replace spray bottle lid and shake to distribute color.
  4. Spray fabric with mist holding bottle 6-8" from fabric. Depressing the sprayer quickly and completely will avoid large splotches of ink.
  5. Allow mist to soak into fabric for approximately 10 minutes.
  6. Iron fabric dry with the iron set on a hot, dry settnig.
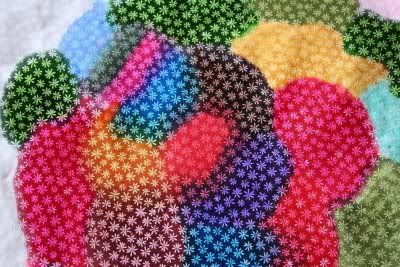
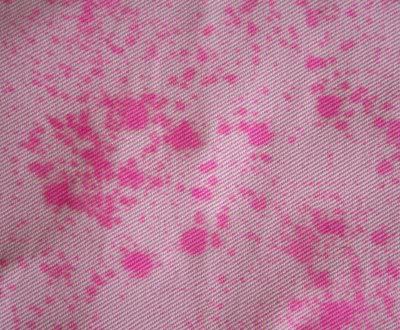
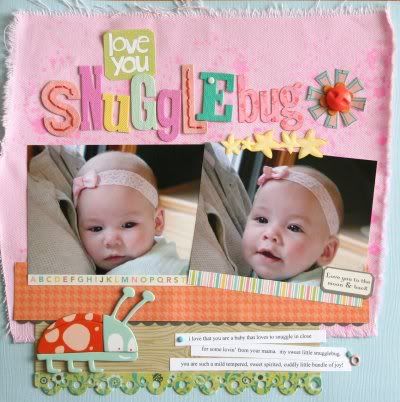
Here's an example of the homemade mist made from re-inker sprayed onto a light pink canvas material.
Photobucket

Photobucket

use re-inker over a resist
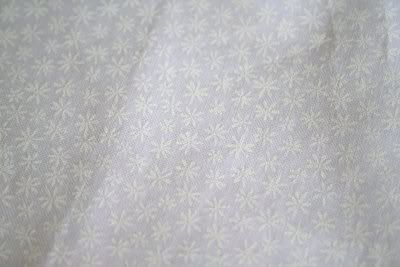
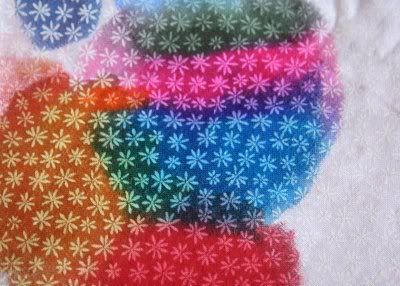
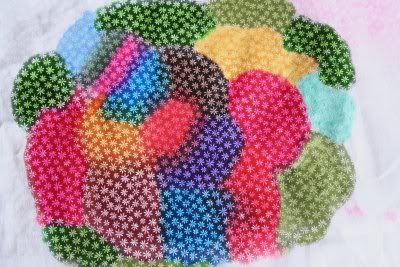
The other way I love to use re-inker on fabric is to find fabrics that have a tone on tone pattern, like white on white. The white print on the white fabrics acts as a resist so you don't have to attempt to stamp & emboss the pattern to create your resist. The work is already done for you!

Now, roll up your sleeves and get ready to play with some re-inker to alter your fabric! (NOTE: If you don't have re-inker, this project can be done using markers or hi-liters as well)

Supplies:
  • Light-colored fabric
  • Re-inkers in various colors
  • Old Rag or Washcloth
  • Newpaper
  • Computer or Notebook Paper
  • Iron
  • Ironing Board
  • Spray Bottle with Water
  • Cardstock
  • Misc. Scrapbook Supplies

1. Iron wrinkles out of your fabric. If you use a fabric with a tone on tone print, you will find that the printed areas work as a resist to the ink creating a really cool effect. I suggest looking in the 100% cotton fabrics for a white or cream tone on tone.
Photobucket

2. Prepare your work surface by laying down several layers of newspaper.

3. Lay a washcloth or other super absorbent cloth flat on your newspaper.

4. Lay your fabric over your cloth.

5. Apply small amounts of re-inker to your fabric. Most of it will seep through rather quickly, but if you have ink that puddles, use the nozzle to spread ink. (NOTE: If you don't have re-inker, you can attempt the same technique using fresh markers. Allow the tip of the marker to bleed onto the fabric as desired.)
Photobucket

6. Continue applying ink as desired.

Photobucket

7. Allow fabric to air dry for 30 minutes.

8. Afterward, continue the drying process with a hot, dry iron by sandwiching the fabric between layers of computer paper or notebook paper. The paper is a way to ensure you don't transfer ink to your iron or your ironing board cover. It also helps absorb the excess ink.

9. Some ink will still have the tendency to transfer after being heat set until they have cured.

10. I allowed my fabric to completely dry and cure for 2 days prior to completely my project.
Photobucket

11.After the 2 days, I simply cut my fabric around the outermost edge of the ink and adhered it to a piece of cardstock.

12. Decorative hand stitching was added, but is not necessary. After stitching was added, the piece was further embellished.

Photobucket

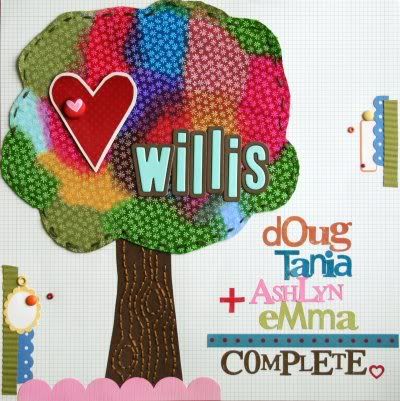
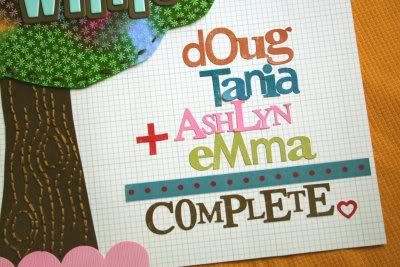
13. The fabric pieces was then used as a tree topper. If you desire another shape, you can create a template prior to inking your fabric and then as you ink the fabric hold the template over top to visualize whether or not you've covered enough of the fabric with ink.

14. Add to your layout and finish embellishing. Hand-stitching is a perfect companion to the texture that fabric offers to your layouts.
Photobucket

**************************
This tutorial is a very small excerpt from my class Scrapbooking with Fabric, as taught at Get It Scrapped! If you are interested in learning more about incorporating fabric into your layouts, and increase your confidence in using fabric altogether, you can purchase the self-paced, jammed packed version of the class by clicking here.

Photobucket

Thursday, January 21, 2010

ANNOUNCEMENT! Embellishments: Beautifully Handmade is BACK!

Photobucket

i'm SUPER excited to announce that a class i taught around this time last year is BACK for round 2! and the best news ever!???----everyone who took the class last year is automatically grandfathered in for FREE!

Embellishments: Beautifully Handmade
taught by ME
runs from Feb 16 - March 19
10 lessons over 5 weeks!
over at Get It Scrapped!

Registration is $25 and you can do so by clicking here.

Photobucket

"In 10 illustrated lessons, Tania Willis shares her cache of ideas, inspiration,and how-tos for hand-making custom embellishments. These embellishments are not only fun, unique, and beautiful, their cost is a fraction of what you'd pay for ready-mades. Learn how to make your own flowers using fabrics, felt, dollar store finds, patterned paper scraps, buttons and brads. Tania will take you through the process of paper piecing, making the ever-popular epoxy buttons, journaling spots and much much more!"

Included:
  • 10 lessons. In each lesson you'll see examples and learn techniques for making home-made embellishments.
  • Work with textiles, dollar-store finds, chipboard, buttons, brads, inks, papers, diamond glaze, watercolors, and more.
  • Use techniques that include: masking, hand-sewing, texturing, painting, glazing, stamping, and imagining your own original embellishments.
  • Access to a private forum and gallery for chatting with and sharing your work with Tania and other participants.
Frequently Asked Questions
Q: How do i register?
You'll need to go to debbiehodge.com and register there. The direct link to the registration page is HERE.

Q: What does the $30 cost include?
The class includes 10 lessons, available in PDF form AND access to a private class message board and gallery where you can talk and share with myself and the other students enrolled. There will be a lesson posted twice a week for 5 weeks. You will need to have Adobe Acrobat Reader installed on your computer. If you do not already have it installed on your computer, it's available for a free download.

Q: How does an online class work, i'm confused?
As mentioned, the class is available in PDF form. The PDFs include VERY detailed instructions along with supporting photographs to walk you through step-by-step of every process. ALSO, i am available on the private message board to supply you with even more additional samples showing you how to put the embellishments we are making to use in your projects (layouts/cards/home decor/etc.). The classes are posted twice a week (Tuesday & Thursday). You will come to the Blackboard area of our private board to download the PDF directly to your computer. You can view it directly on your computer, OR print it and take it with you, AND you can save it to your computer to refer to over and over and over again. They are posted by 9AM, EST on class days.

Q: Do I have to be there on the exact day the class is posted to be able to get that day's lesson?
NO. the beauty of an online class is that you can make it fit YOUR schedule. the lessons are posted and will remain posted on the private forum for AT LEAST 6 months.

Q: What if i get confused and have questions once i'm in the class?
We have a private message board for you to talk and communicate with me through the entire 5 weeks....and beyond. You will also be able to share and communicate with the other students in the class. I also welcome questions through email.

Q: What if i have dial-up service? Can i still take the class?
Absolutely. If the files are too large to load online or loading is too slow, we will accomodate and email you the files instead. Then you can still come over to the message board for all the chatter.

Q: How much sewing is involved? Do I have to know how to sew?
Absolutely, not. There are no pre-requisites to this class. We will not be using a sewing machine, but we will be using some minor hand-stitching. In the tutorial, i use the assumption that you have never sewn anything by hand before and am very descriptive in mentioning, dominant hand/non-dominant hand. Left-handers won't struggle at all. I'm left-handed myself.

Q: What supplies will i need?
A complete supply list will be provided upon registration, but they are all basic scrapbooking supplies and basic crafting supplies (felt/fabric/buttons/floss). Some supplies are even available at your local dollar store. Many of my past students have said they didn't have to go out and buy a single thing. It's all common items.

Q: What other perks are there to your online class?
In addition to the 10 lessons, I have bonus materials to post throughout the class. AND GIVEAWAYS. ya'll know how much i love giveaways! :o)

Q: What exactly will we be making?
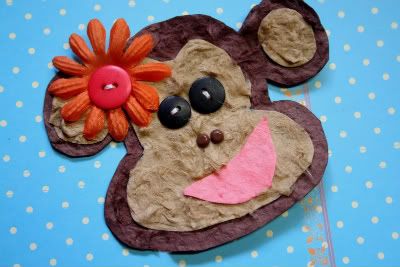
we'll cover many topics for handmade embellishments....crafting with fabric, felt flowers & accents, epoxy buttons, paper piecing (the MONKEY) and MUCH more.

if you still have questions that weren't answered, please email me and i'll get back to you right away! the email link is --------------> over there under my photo.

Photobucket

LinkWithin

Related Posts with Thumbnails